Product feed campaigns on ChatGPT Ads
How to get a catalogue into ChatGPT Ads — the feed spec, the three delivery methods, product filters, and the two-week expiry that catches people out.

If you sell more than a handful of products, writing one ad per product is not a plan. Product feed campaigns are the answer: you upload your catalogue once, and ChatGPT builds the ads from your product data.
They also work differently enough from a standard campaign that most of what you know about setting one up does not transfer. There is no ad copy to write. There are no context hints. The targeting is your catalogue.
Here is the whole thing, from the file format up.
What a feed campaign actually is#
In a standard campaign you write a headline, a description, and pick an image. In a feed campaign you upload structured product data, and the platform generates ads from it — product image, title, price, sale price, star rating, and your brand.
OpenAI's own help documentation is unusually direct about how these perform:
Ads created from product feeds have been among the strongest-performing ads in our program to date.
Take that with the appropriate salt — it is a platform describing its own product — but the structural logic holds. Feed ads carry price and rating, which are exactly the details someone comparing products in a conversation wants to see.
One beta limitation you need to know before investing time. During the beta, feed products are eligible for ads only. They do not appear in organic ChatGPT conversations. The documentation says that capability may come later, but today a feed is an advertising asset, not a route into ChatGPT's organic shopping surface.
Step 1: create the feed#
Tools → Feeds → Create Feed. The dialog asks for a display name and how you will send products.
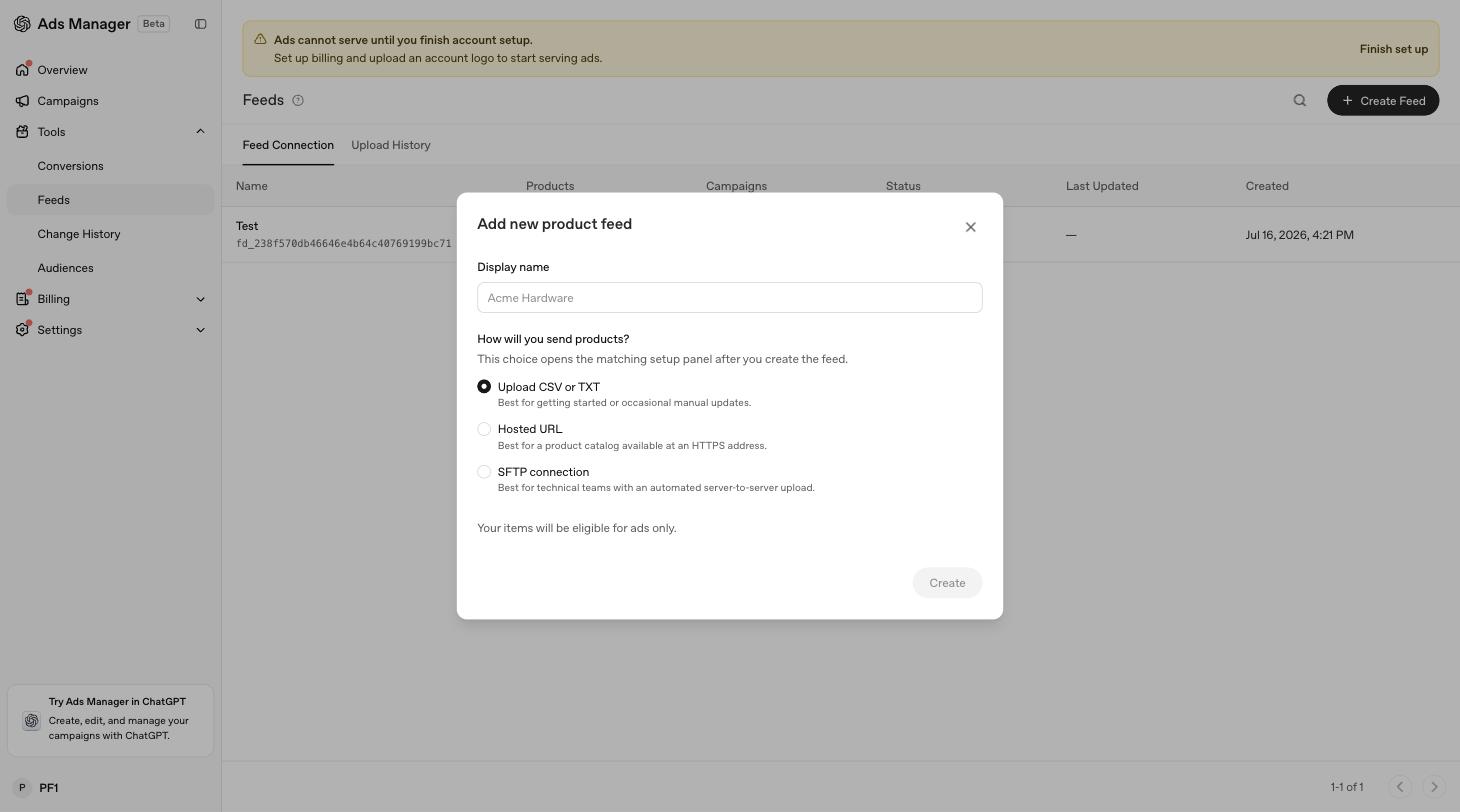
Three delivery methods, and the choice matters more than it looks:
| Method | Best for |
|---|---|
| Upload CSV or TXT | Getting started, or occasional manual updates |
| Hosted URL | A catalogue available at a stable HTTPS address |
| SFTP connection | Technical teams automating server-to-server uploads |
Items expire after two weeks. This is the single most important operational fact about feeds and it is easy to miss. A one-off CSV upload will quietly stop serving fourteen days later. Unless you enjoy calendar reminders, use a hosted URL or automated SFTP so the catalogue refreshes itself.
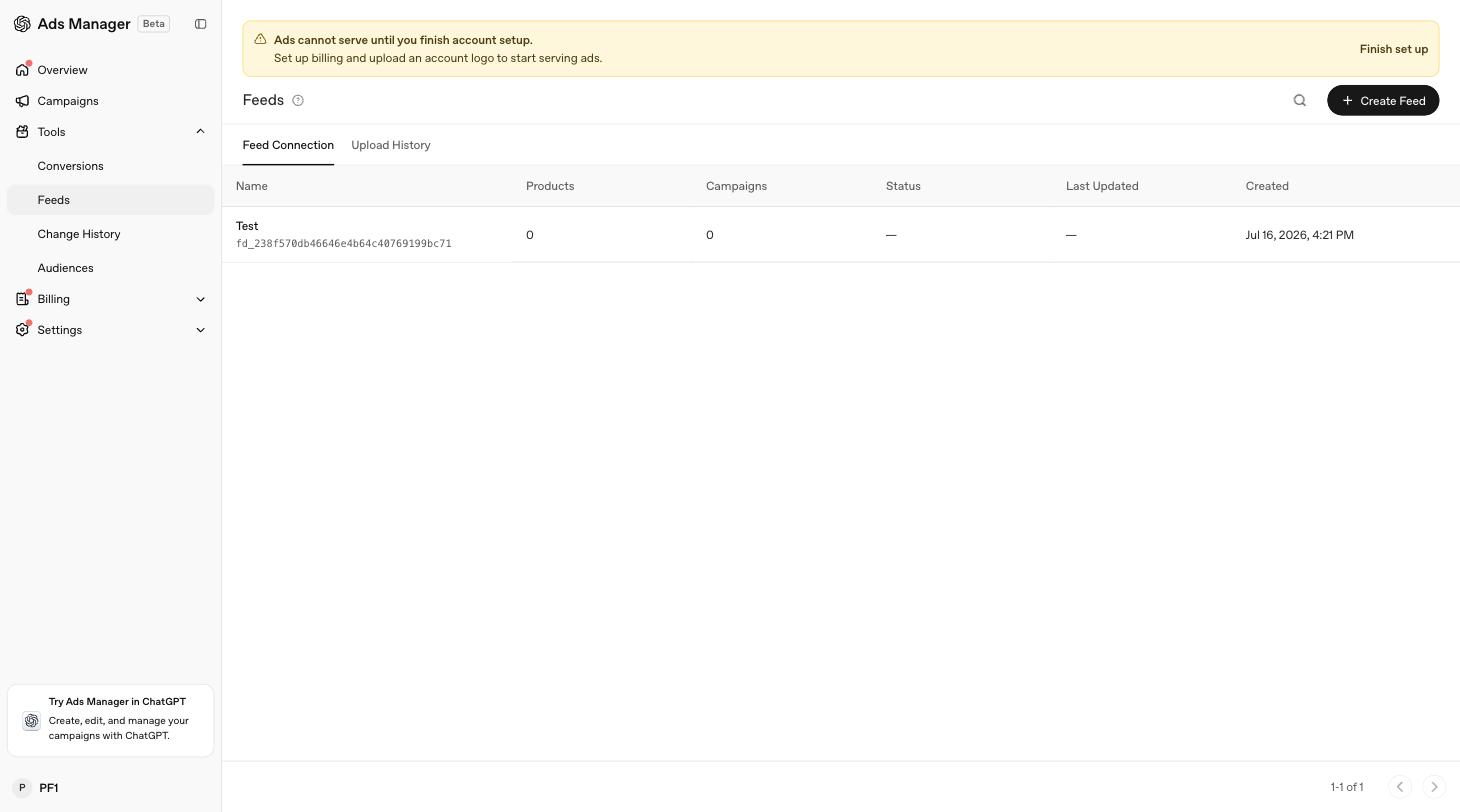
You are not locked into one method. Once a feed exists, the three-dot menu on its row offers Upload CSV or TXT, Set up hosted URL, and Edit SFTP Connection alongside View products and Edit feed details.
Step 2: the file format#
This is where feeds succeed or fail. Get it wrong and you will be reading validation errors instead of running ads.
The container#
- UTF-8 encoded, tab-delimited
.txtor.tsv, or comma-delimited.csv - Gzip is fine:
.txt.gz,.txt.gzip,.tsv.gz,.csv.gz - One header row, using lowercase underscore-separated field names
- One product or variant per row
JSON, XML, RSS, Atom and spreadsheet files are not supported. If your ecommerce platform exports a Google Shopping XML feed, that is the wrong format — export a delimited file instead.
Two schemas, and OpenAI picks one for you#
There are two ways to name your columns.
The OpenAI schema uses item_id, url, and image_url. The Google-compatible schema uses id, link, and image_link — the same names you already use for Google Shopping — and OpenAI maps them across.
You do not declare which you are using. OpenAI samples rows from your upload, checks its own schema first, and falls back to the Google-compatible profile only if the OpenAI parser rejects every sampled record. One parser is chosen per upload and used for every row; it does not switch mid-file.
In practice: if you already have a Google Shopping feed, try it as-is. The compatibility path exists precisely so you do not have to rename columns. It covers a core profile, not every attribute, so check Upload History rather than assuming.
The required fields#
Sixteen fields are required. Using OpenAI schema names:
| Field | Notes |
|---|---|
item_id | Unique per variant, and stable over time |
title | Plain text, up to 150 characters |
description | Plain text, up to 5,000 characters |
url | Product detail page |
image_url | Main product image |
brand | |
price | Amount plus a three-letter currency code, e.g. 79.99 USD |
availability | in_stock, out_of_stock, pre_order, backorder |
availability_date | Required when availability is pre-order or backorder |
seller_name | Display value; OpenAI substitutes your registered merchant name |
target_countries | ISO country codes; the first entry is used |
is_eligible_search | Can it surface in ChatGPT search |
is_eligible_checkout | Can it be bought inside ChatGPT; needs search true |
is_ads_eligible | Required for ads processing |
seller_privacy_policy | Required when is_eligible_checkout is true |
seller_tos | Required when is_eligible_checkout is true |
A few rules that reject rows rather than warning you:
price must be positive and carry its currency. If you use sale_price, it must be positive, use the same currency as price, and be lower than it.
A URL containing a username or password rejects the row. Credentials in a url or seller_url kill the product outright. OpenAI redacts them from the error, so you may see a validation failure with the offending part removed.
Provide gtin or mpn unless the product genuinely has no identifier. Set identifier_exists to no only when that is actually true.
Fields that show up in the ad#
Product ads display images, titles, prices, sale prices, stars and your brand. That makes some technically optional fields worth treating as required:
star_ratingandreview_count— these are what put stars in your adsale_pricewith its date range — this is what draws the strike-throughadditional_image_urls— comma-separated extras
Leaving ratings out of a feed means competing against ads that have them, with an ad that does not.
Step 3: upload and validate#
The upload panel has a drop zone and a link to the full field requirements.
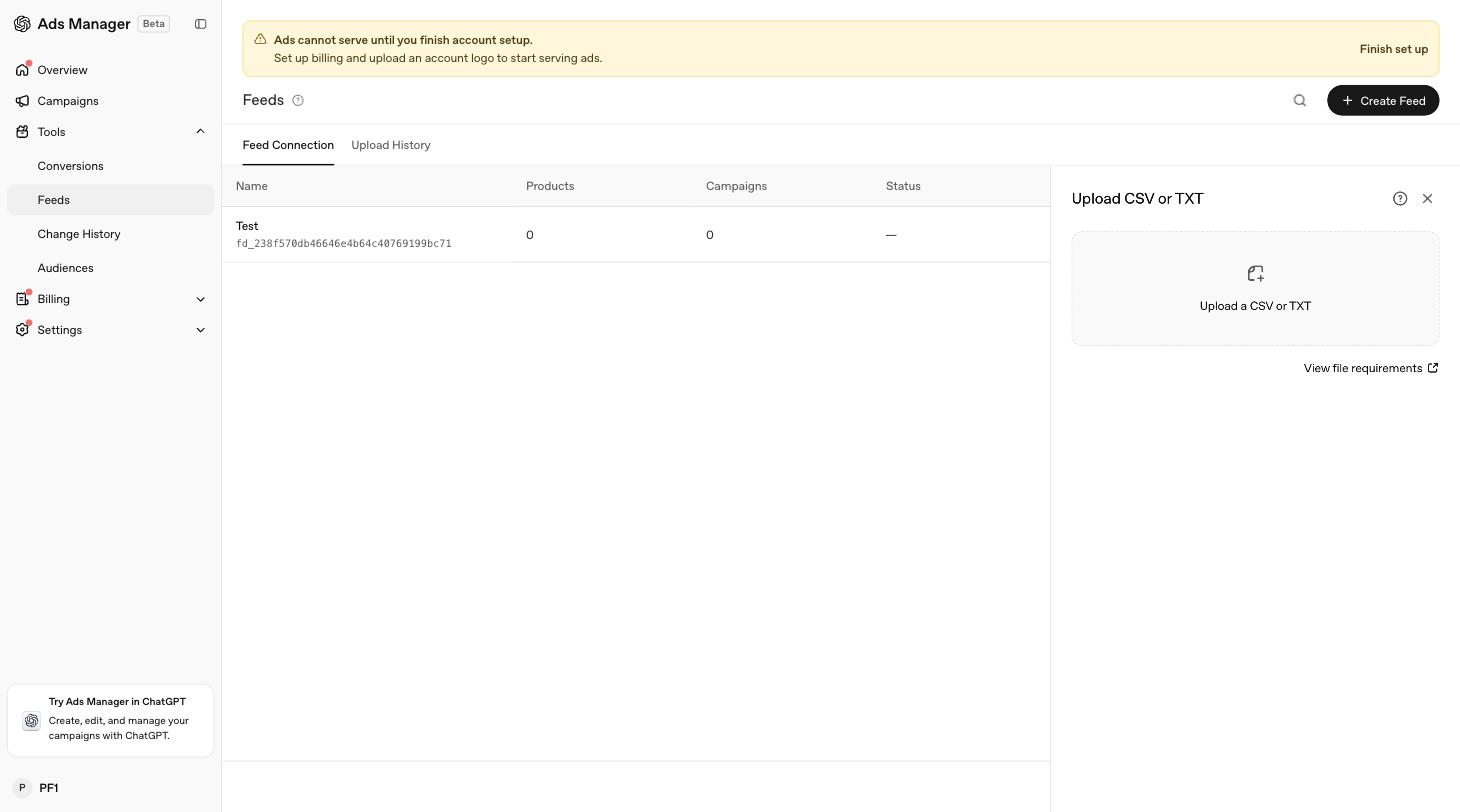
Processing takes anywhere from a few minutes to a few hours depending on feed size. Check the Upload History tab — it reports missing required columns and values that failed validation. One malformed product does not sink the upload; OpenAI rejects that row and carries on with the rest, which is generous but also means a quiet 10% rejection rate is easy to miss.
Step 4: the campaign#
Campaigns → Create campaign → set Campaign type to Product feed, and a new field appears: which feed this campaign draws from.
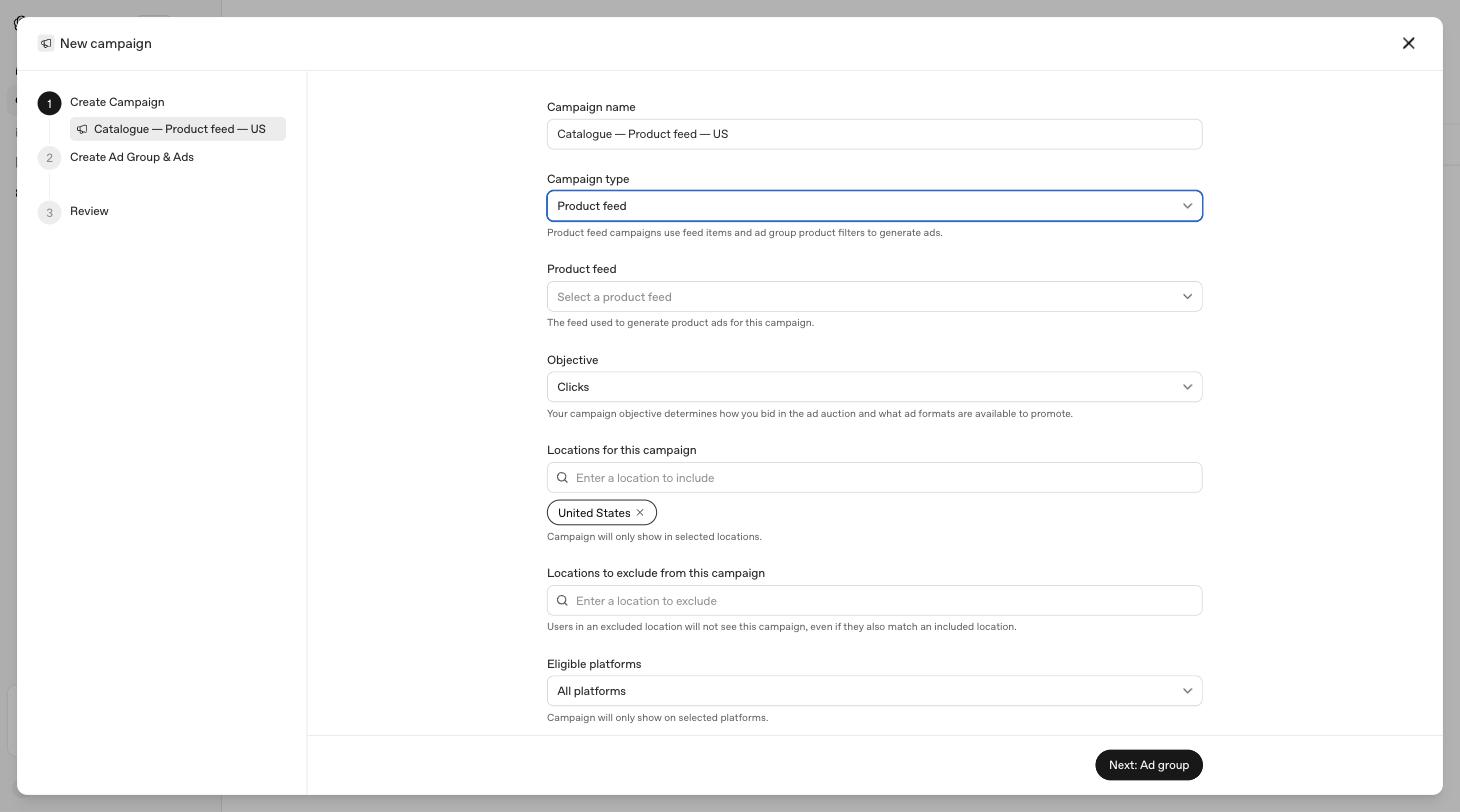
The panel describes the model in one line:
Product feed campaigns use feed items and ad group product filters to generate ads.
Everything else at campaign level — objective, locations, platforms, budget, schedule, landing page parameters — behaves exactly as it does in a standard campaign. If you have not built one of those yet, start with the step-by-step campaign guide.
Step 5: the ad group, where feeds get interesting#
This is where a feed campaign stops resembling a standard one.
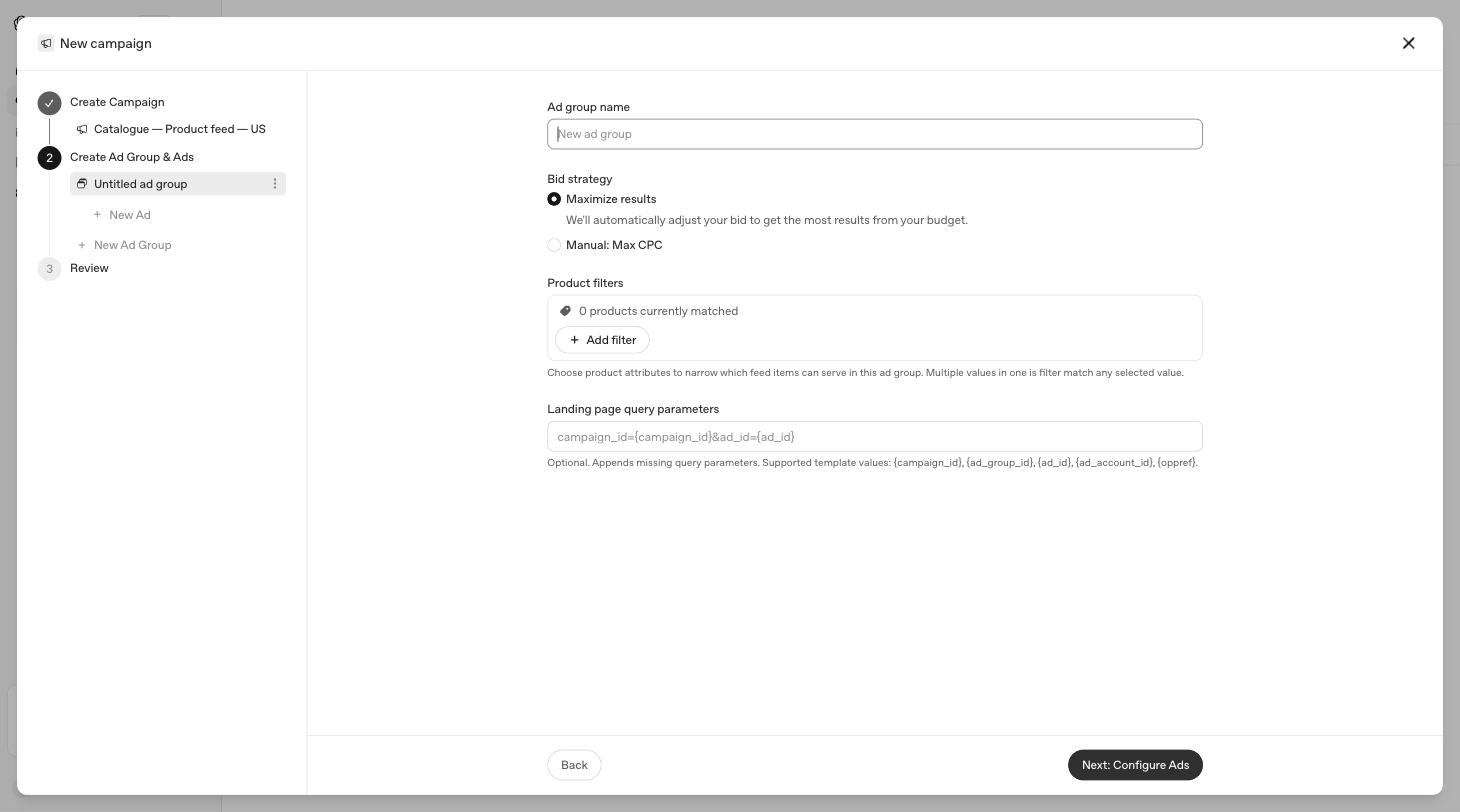
A standard ad group asks for a destination URL and context hints. A feed ad group asks for neither. Both fields are simply gone. Destinations come from each product's url, and matching comes from the product data itself.
What replaces them is Product filters, with a live count of how many products currently match.
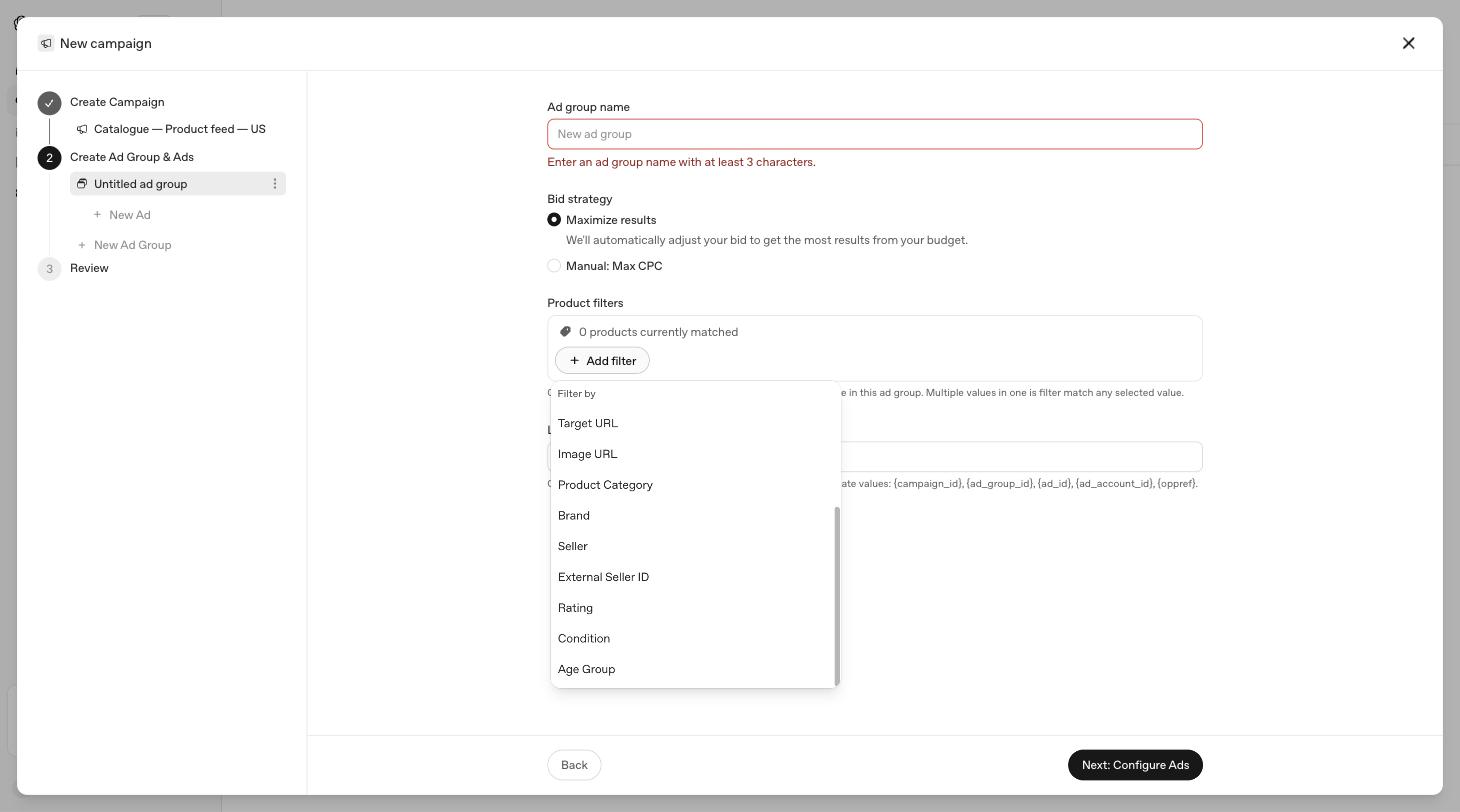
You can filter on: Title, Description, Item ID, Offer ID, Price, Target URL, Image URL, Product Category, Brand, Seller, External Seller ID, Rating, Condition, and Age Group. Multiple values within one filter match any of the selected values.
Watch the matched-product count as you build. It is the only honest signal of whether your filters mean what you think. Zero products matched means the ad group will not serve, and nothing later in the flow will stop you.
When the filters are not enough#
Fourteen attributes covers a lot, but not "these are my high-margin lines" or "these get the aggressive bid". OpenAI's documentation points two ways here, and they do not fully agree.
The help centre suggests adding an ads_metadata field to your feed with values such as bidding_tier or product_line, then grouping products by them. The developer specification is stricter: ads_metadata uses "keys configured for your Ads integration", and it says plainly, "Do not invent targeting keys; confirm them during Ads setup." Its example uses a custom label instead:
{ "custom_label_0": "summer" }
For Google-compatible feeds, the equivalent columns are custom_label_0 through custom_label_4.
Confirm which keys your account supports before building a feed around them. Neither custom labels nor ads_metadata appeared in the ad group filter list in this account, and the API reference for ad-group filters doesn't list them either. The filterable set is described as configured per integration and expected to change, so treat any list — including the one above — as a snapshot.
Step 6: the ad template#
Instead of writing ads, you create one ad template per ad group. It is the base for every product that passes the filters.
The template currently only lets you choose the image field. Titles, descriptions and prices come from the feed. Review the sample product preview before moving on — it is the only place you will see what the generated ads actually look like.
Where the Products tab misleads people#
There is a Products tab beside Campaigns, Ad groups and Ads. It looks like a list of your catalogue. It is not.
The Products tab is a reporting view. A product appears there only after it has delivery data from an active feed campaign. If your campaign has not started, has a future start date, or has not delivered yet, that tab will be empty or short — and none of that means your upload failed.
Two consequences worth internalising:
- To confirm your products are ready, use the matched count in the ad group flow, not the Products tab.
- After delivery starts, allow up to seven hours for reporting to appear.
The order to do this in#
- Export a delimited feed — try your existing Google Shopping export first.
- Create the feed in Tools → Feeds and pick hosted URL or SFTP, not a one-off CSV, unless you are only testing.
- Upload, then read Upload History properly rather than assuming success.
- Build the campaign with type Product feed and select the feed.
- In the ad group, add filters and watch the matched count until it is the set of products you meant.
- Build the ad template and check the sample preview.
- Launch, then wait several hours before judging anything in reporting.
The Ads Manager is still in beta and visibly moving — field help text has already changed between visits while writing about it. If a label here does not match what you see, the panel is right and this page is out of date.
I build LLM Pixels, a Shopify app for ChatGPT Ads conversion tracking.